Sacrifice at Chichen Itza
This piece is a digital painting of a Mayan warrior after a sacrifice at the famous Mayan temple of Chichen Itza. The pose and costume were inspired by the film ‘Apocalypto.’ The full painting was made at 300ppi and is 18×24″. It was completed on 12/20/12. View on my website: http://www.jcstudios.org/illustration/2012/12/sacrifice-at-chichen-itza/

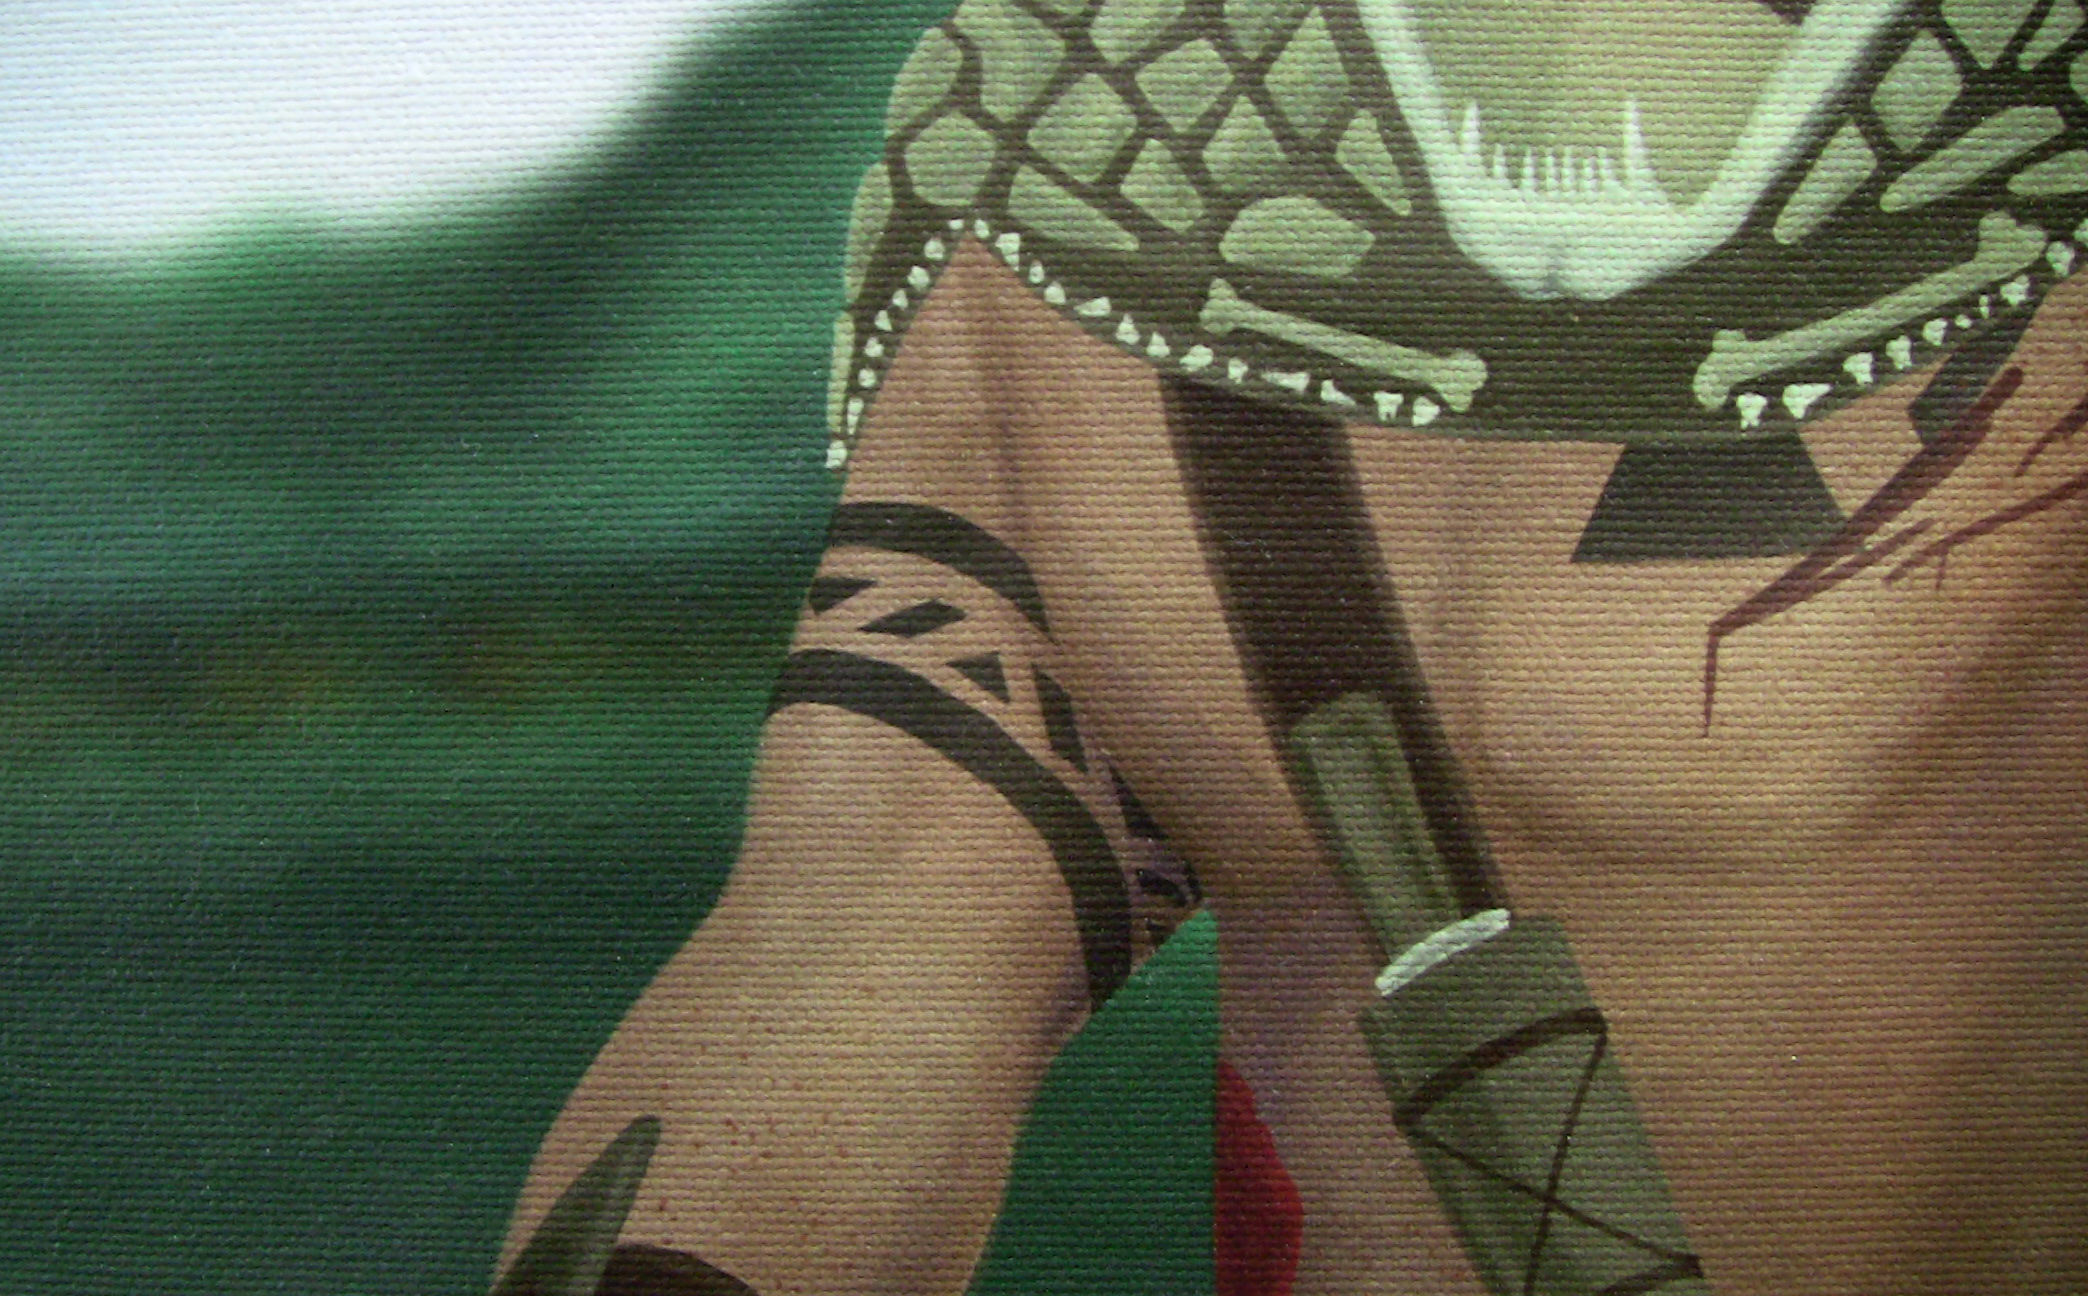
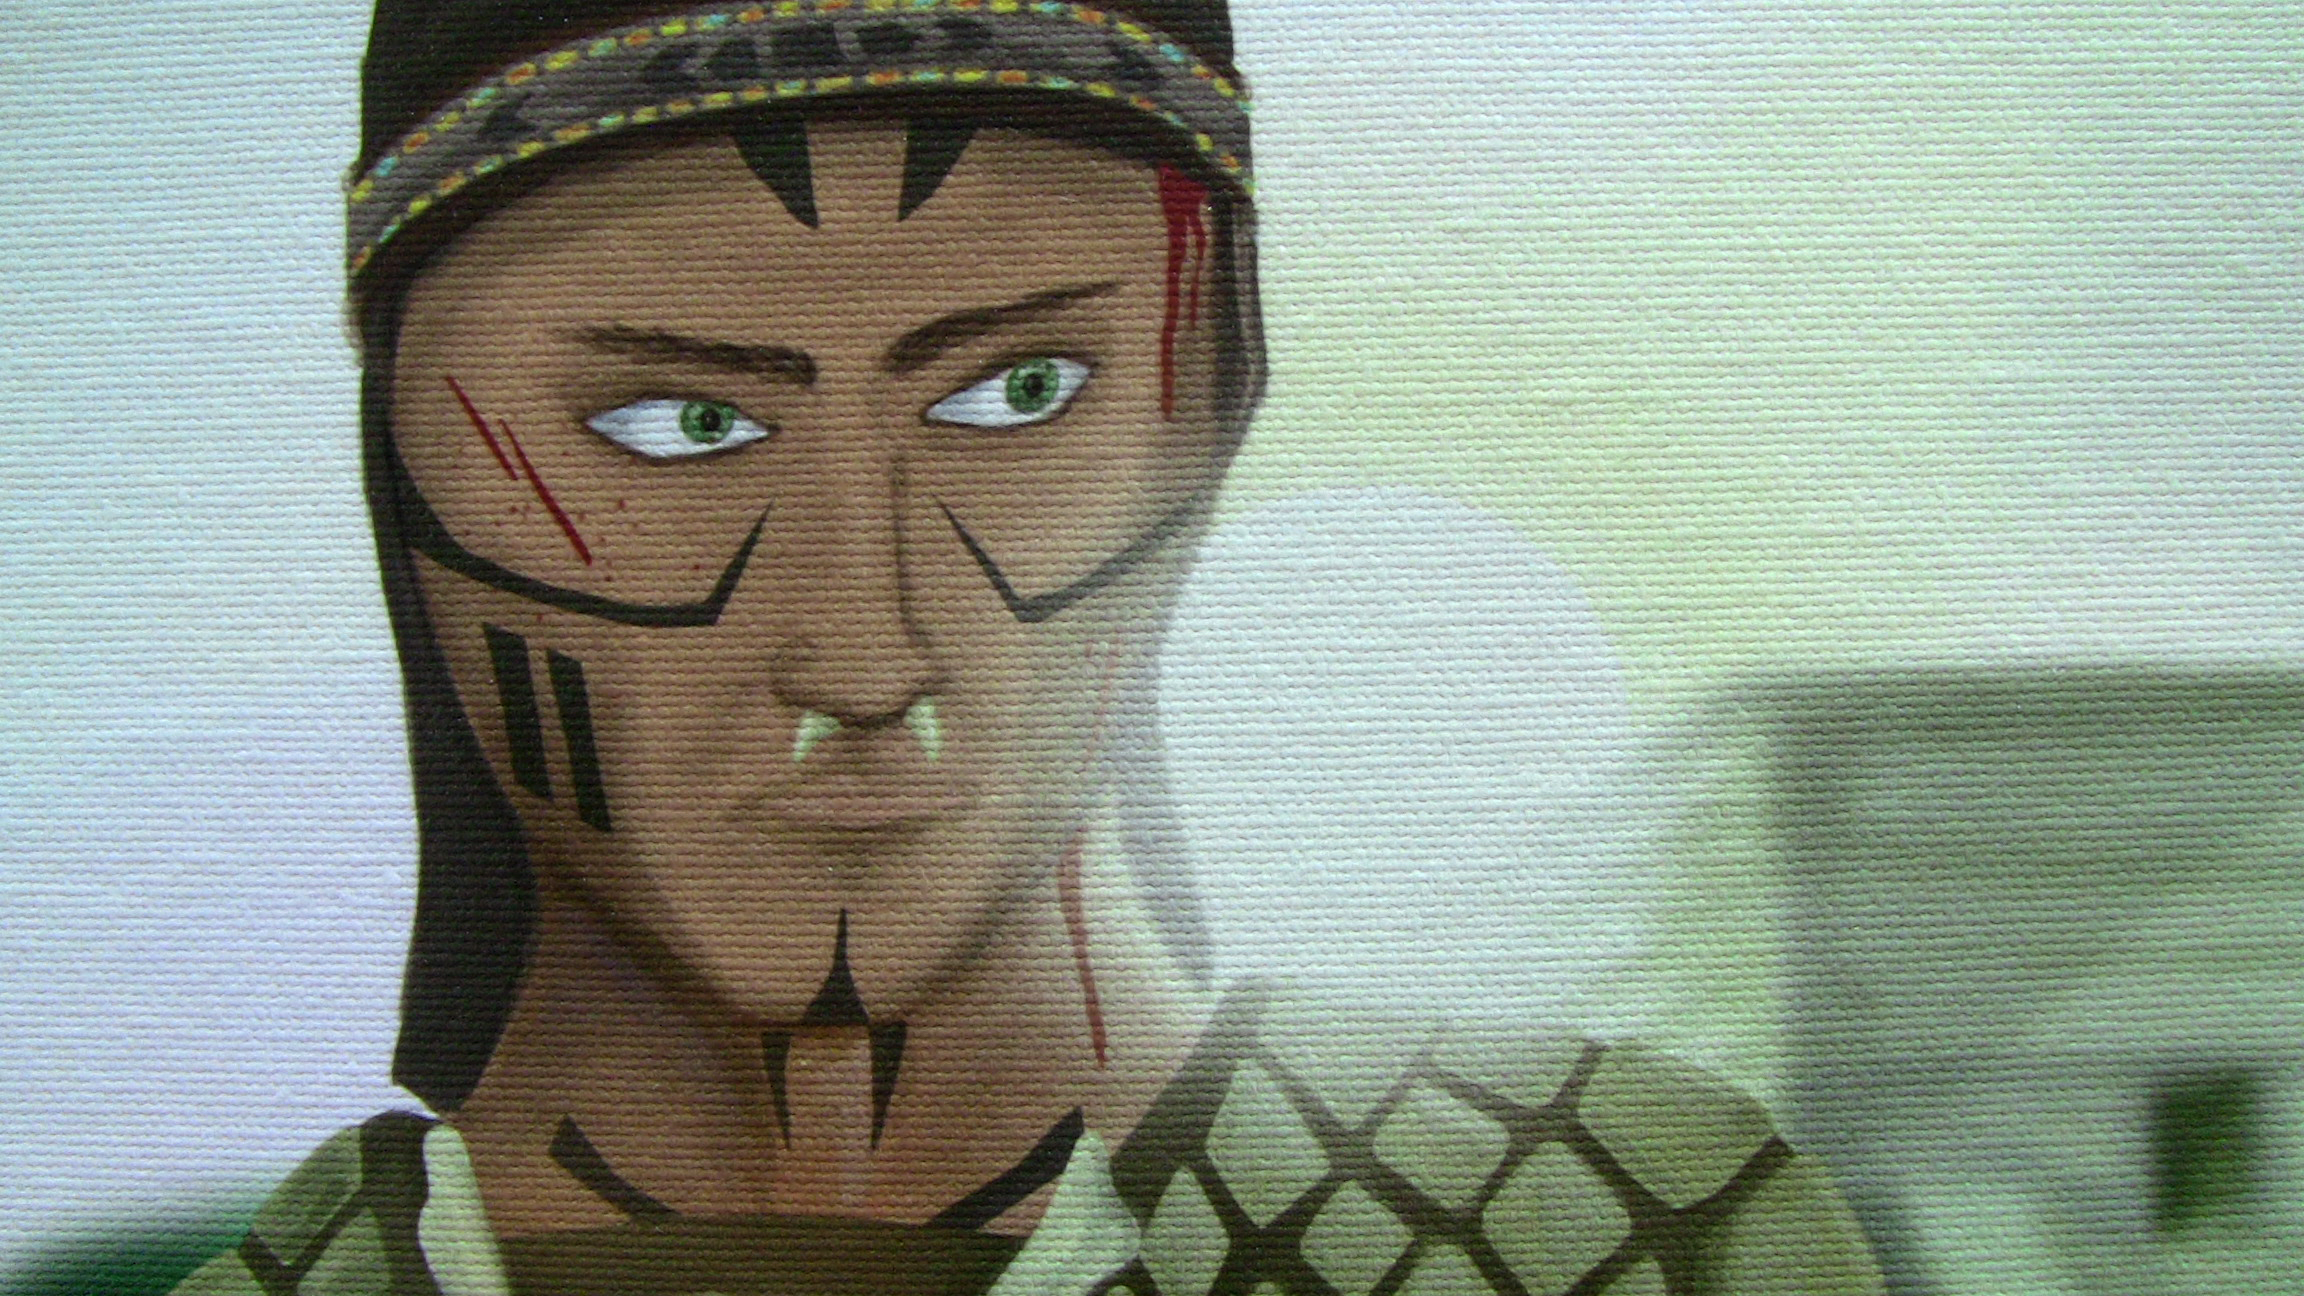
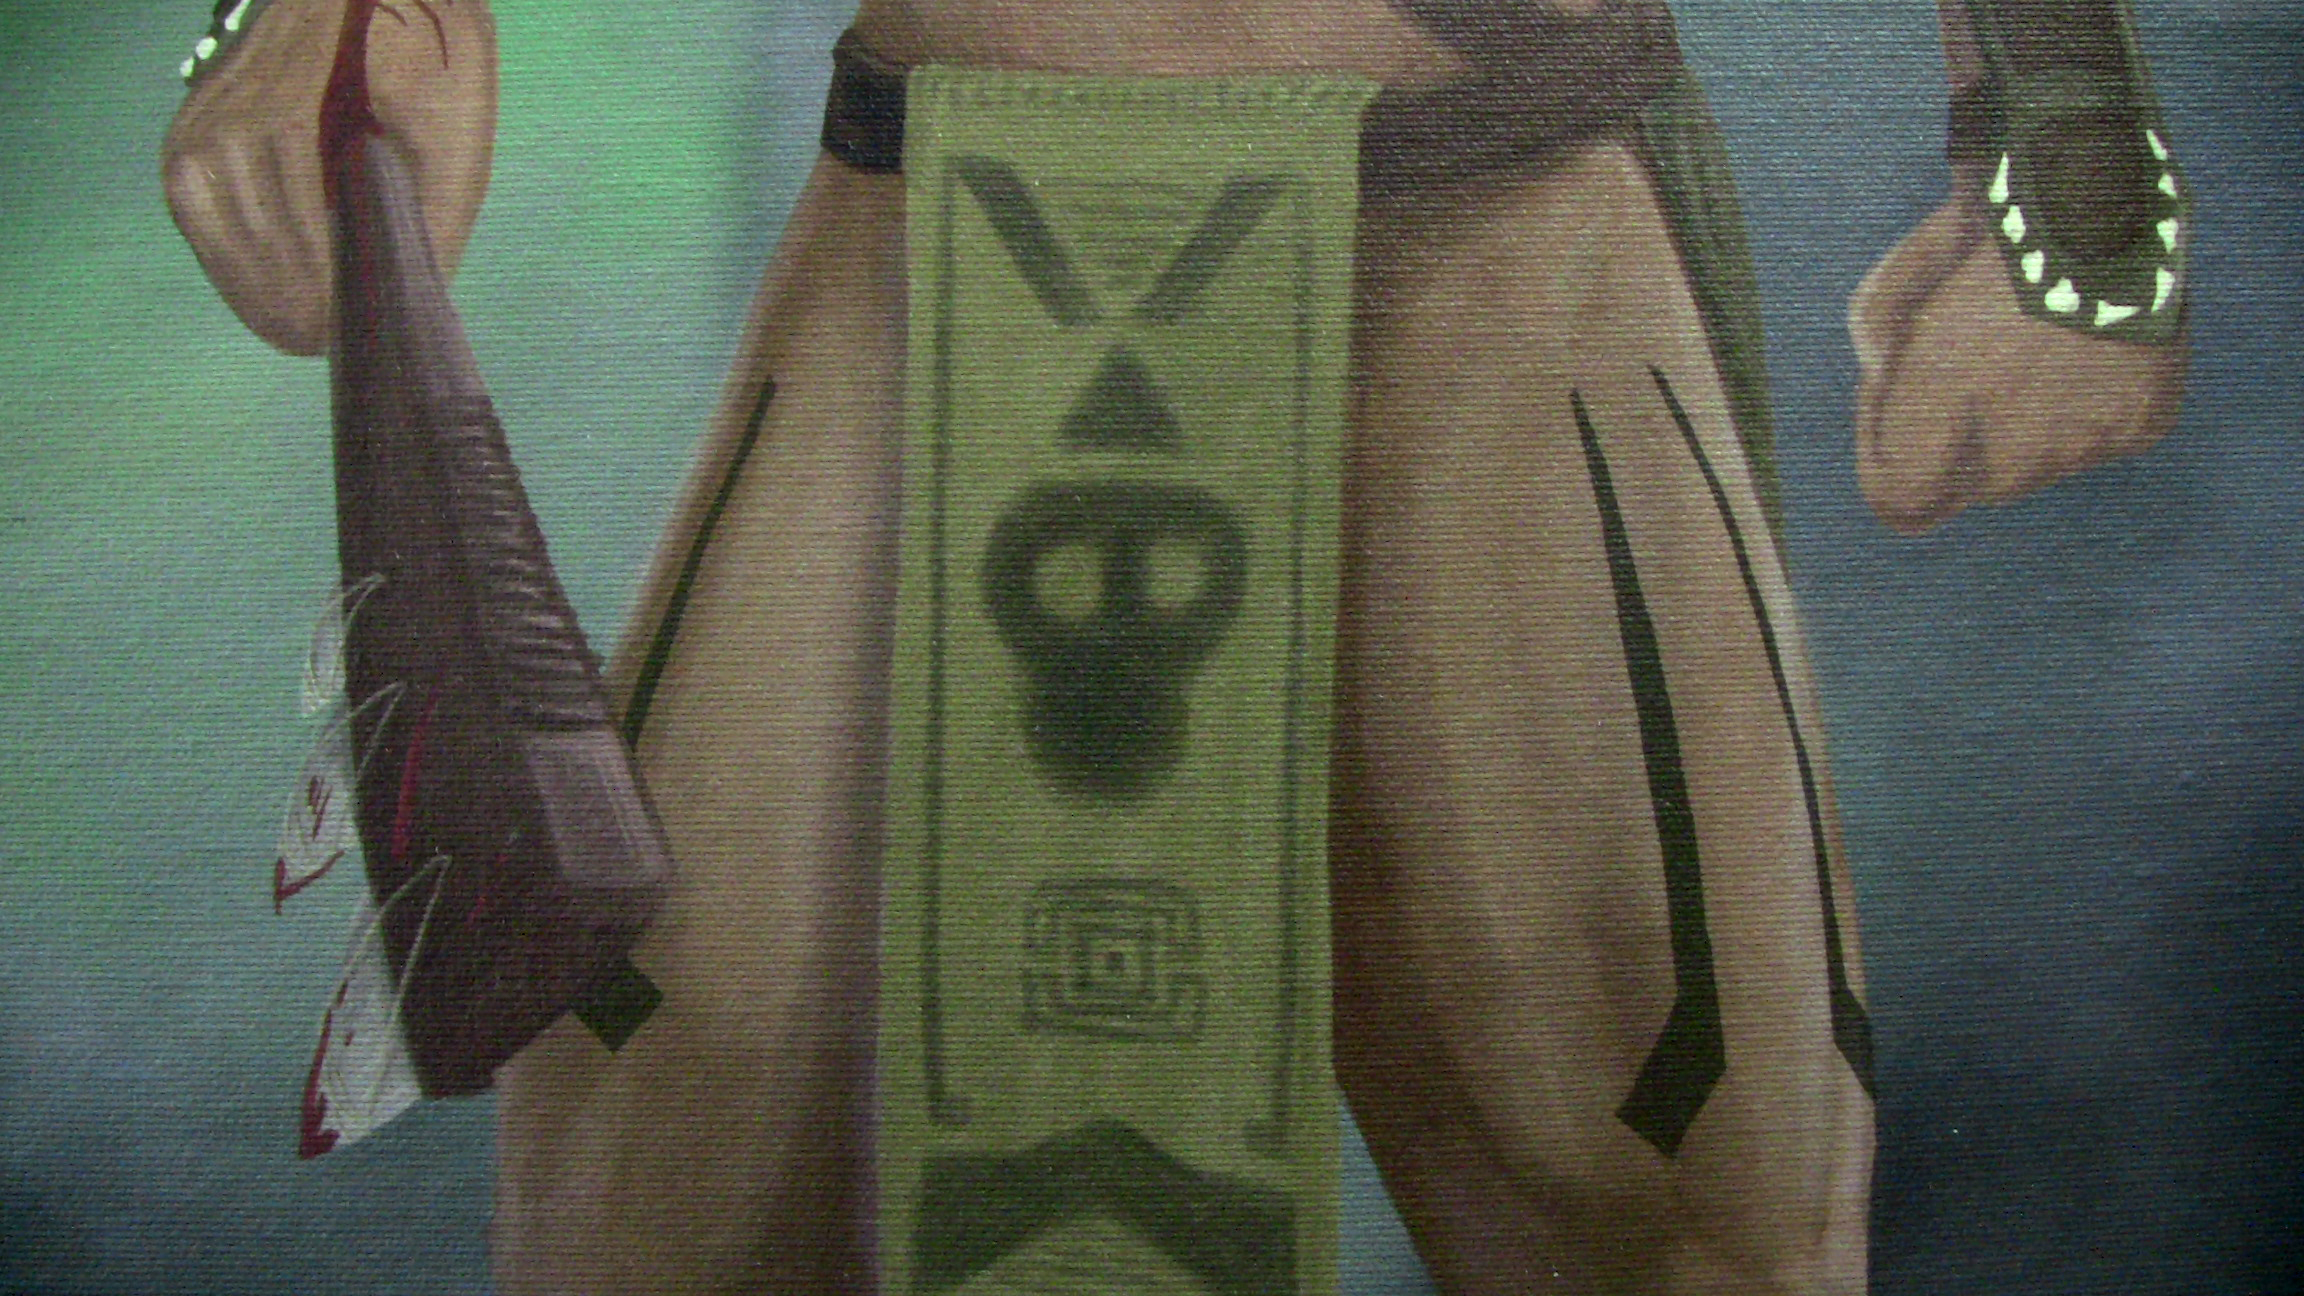
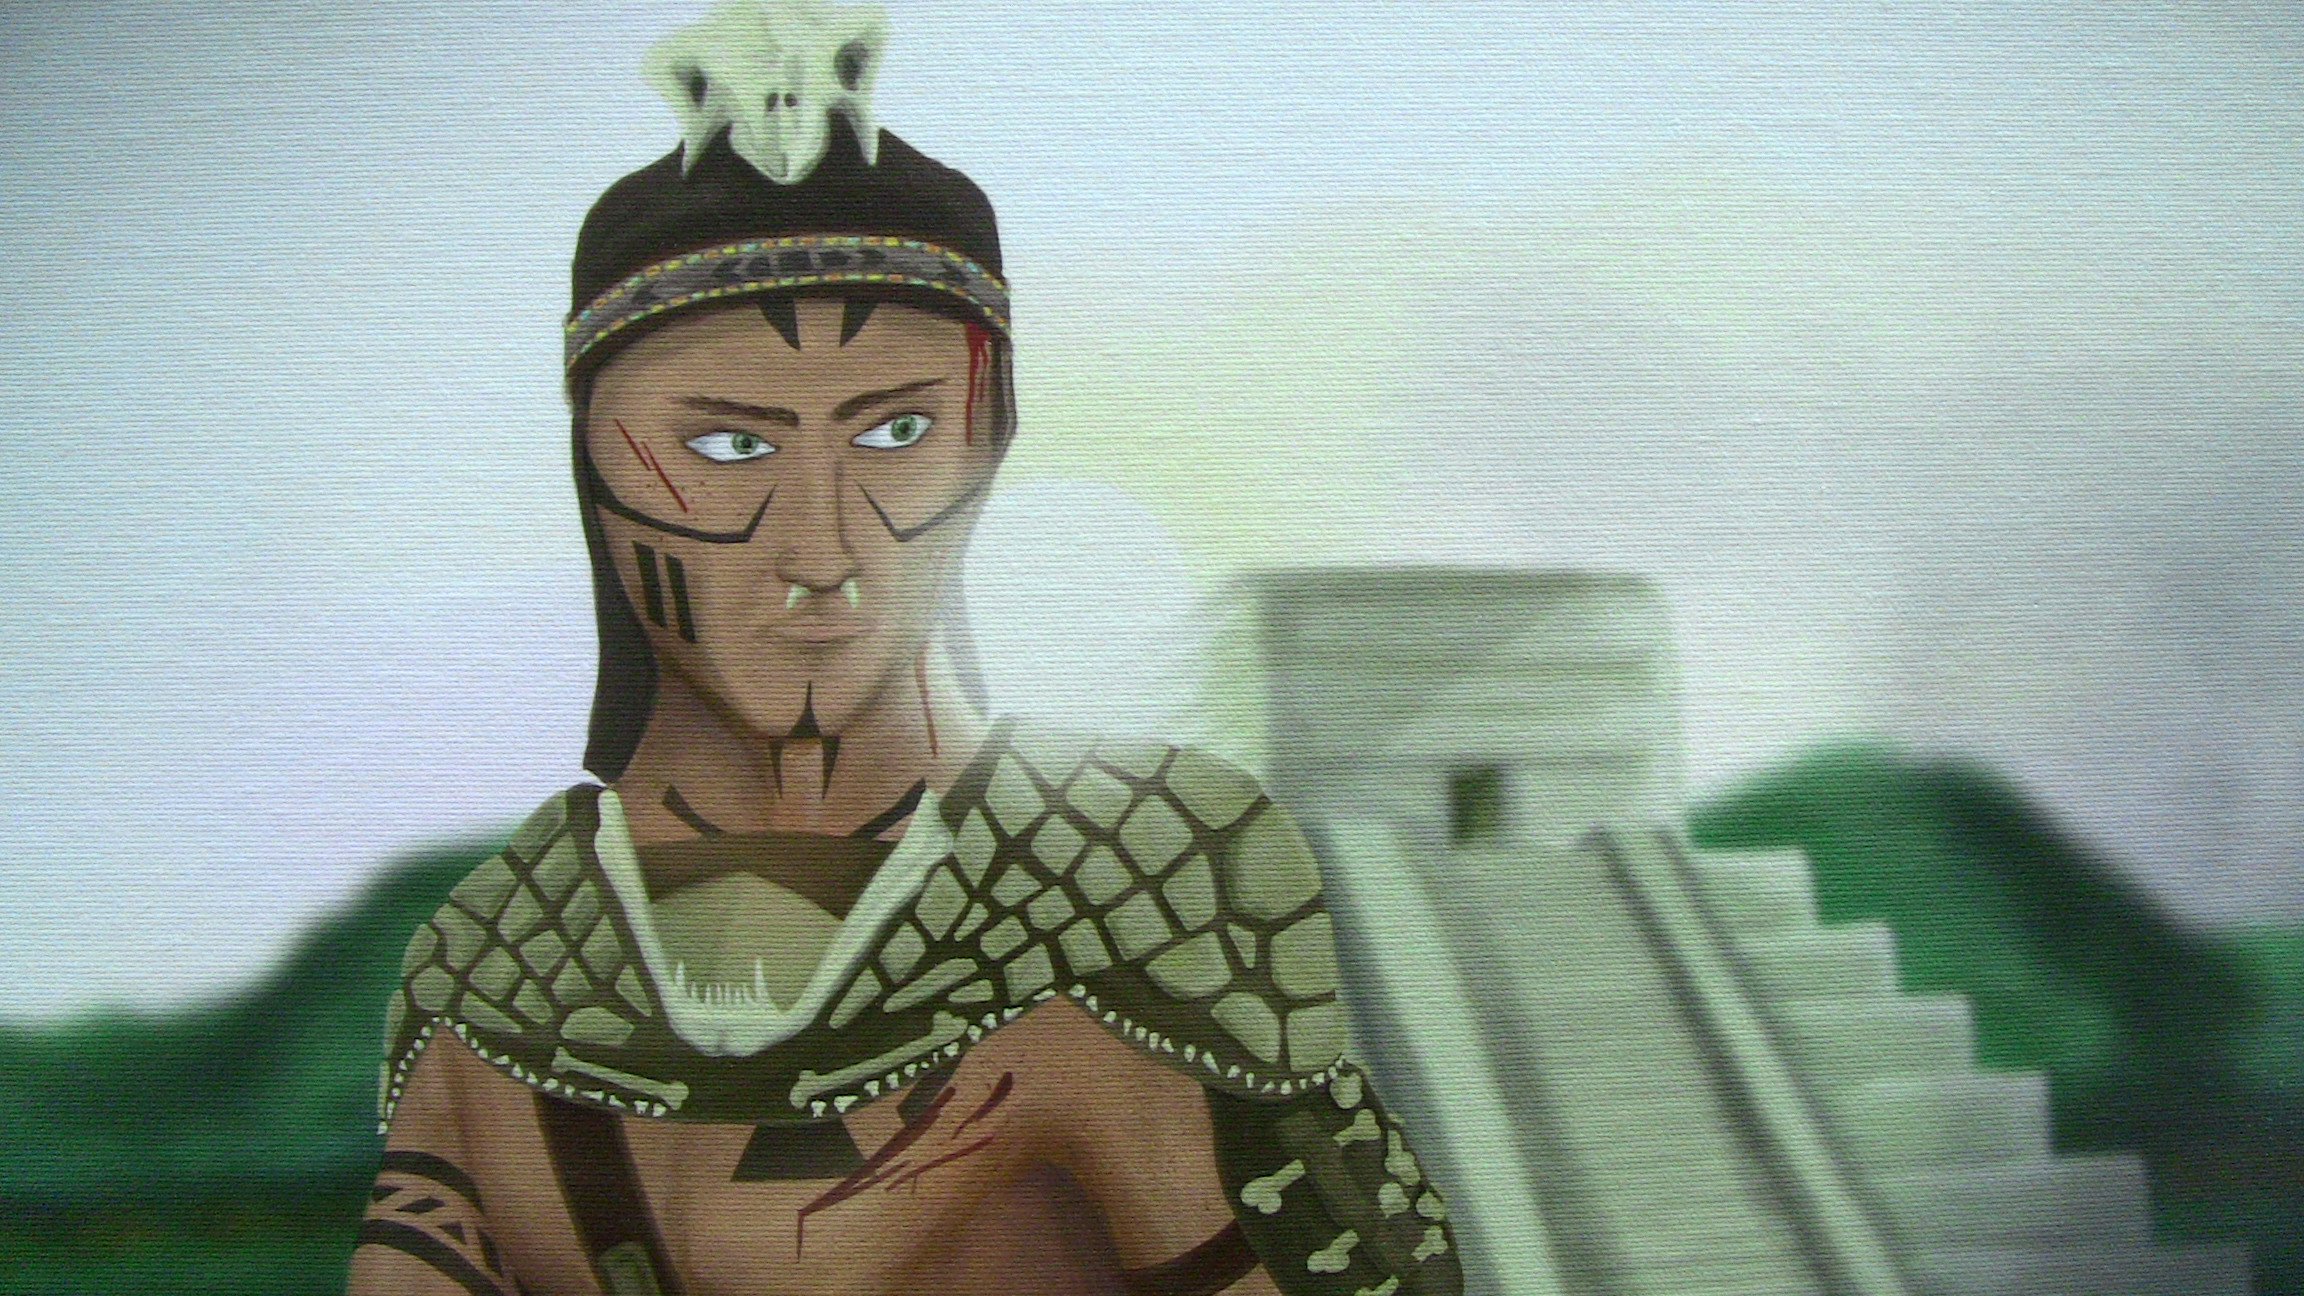
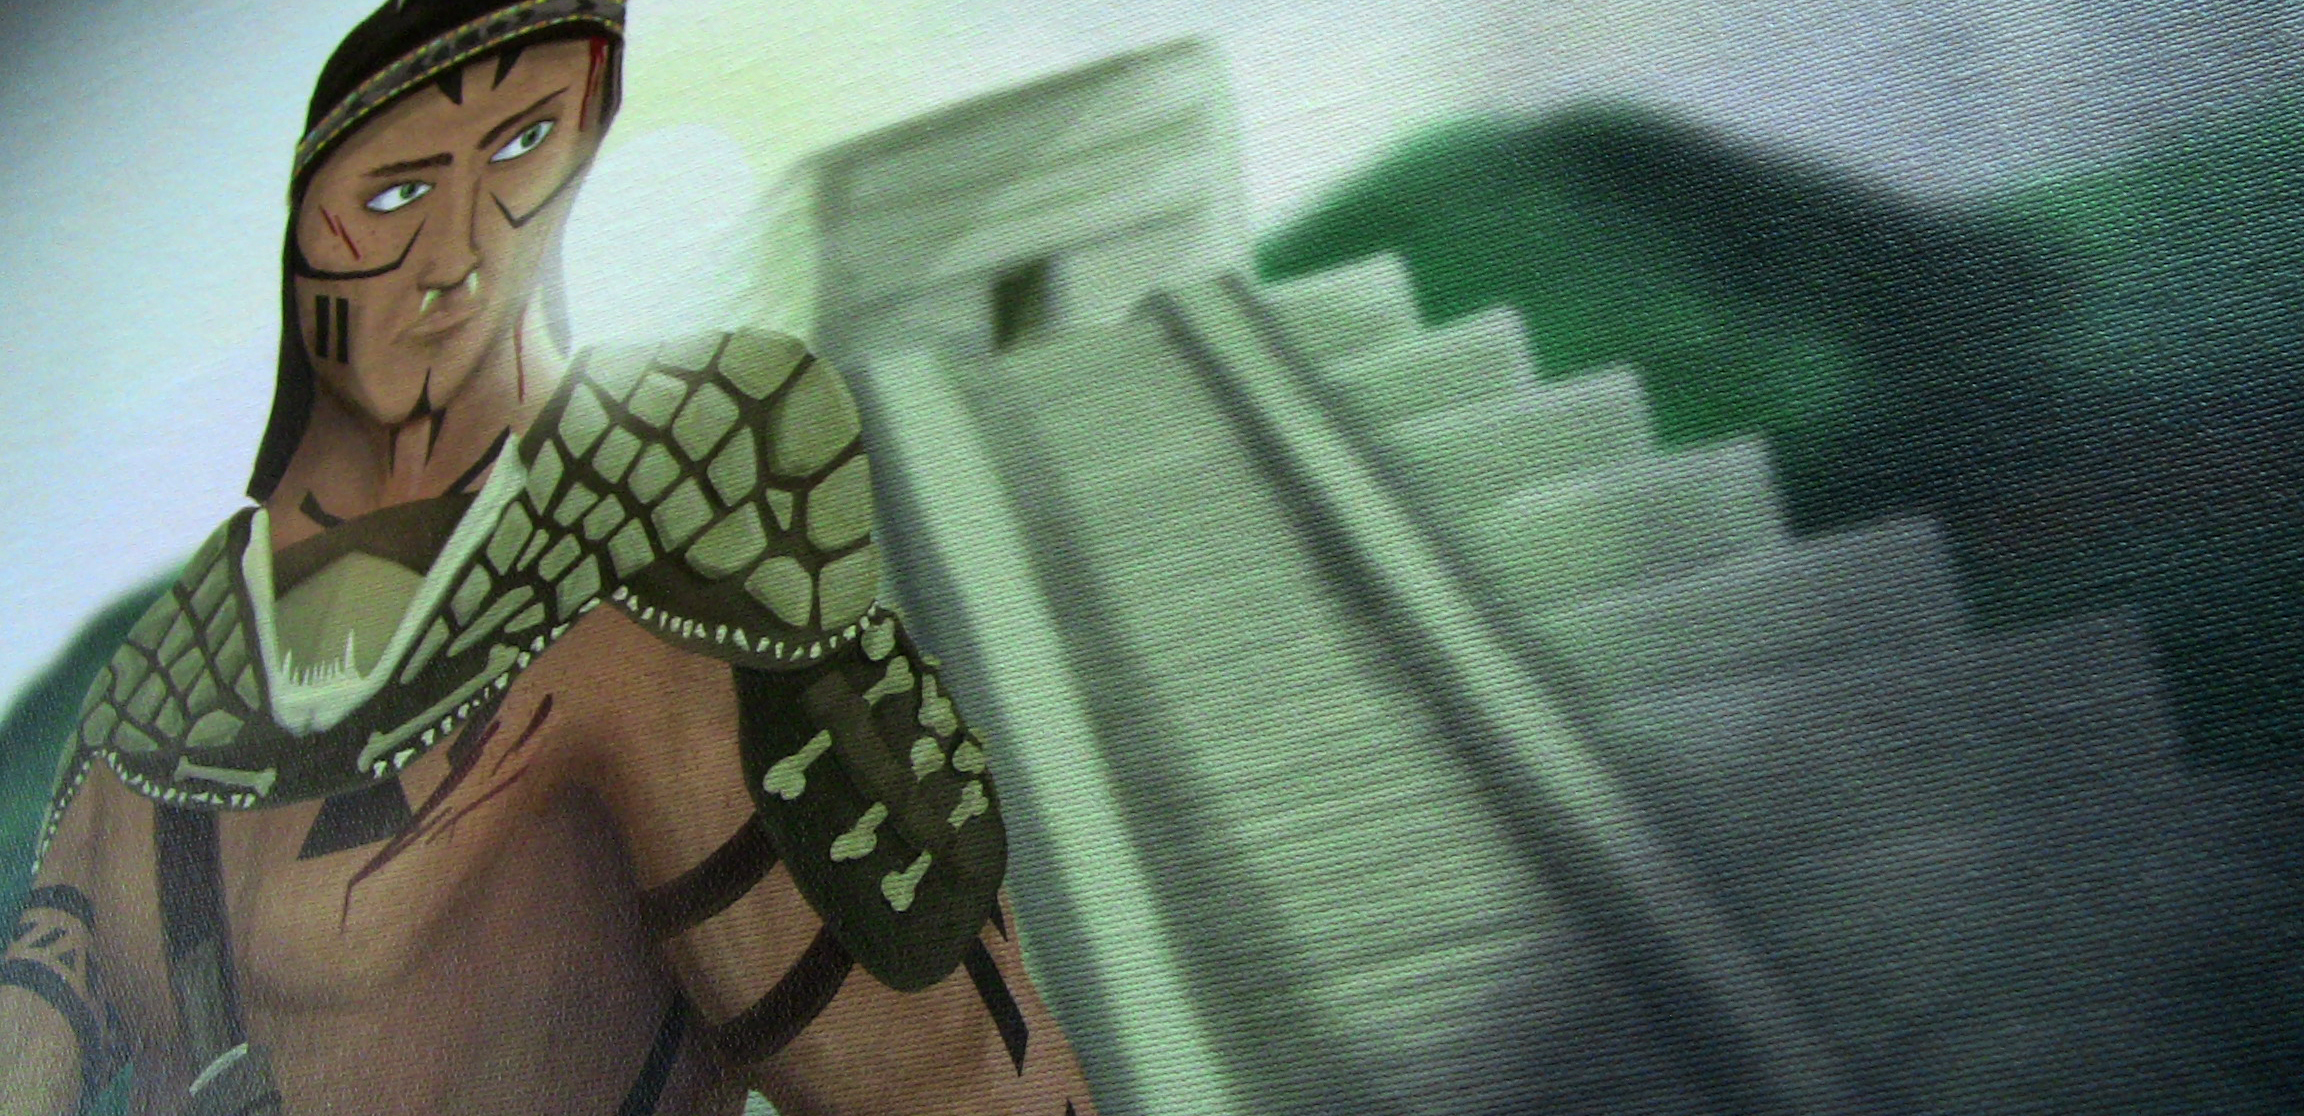
This piece is a digital painting of a Mayan warrior after a sacrifice at the famous Mayan temple of Chichen Itza. The pose and costume were inspired by the film ‘Apocalypto.’
The full painting was made at 300ppi and is 18×24″. It was completed on 12/20/12.
View on my website: http://www.jcstudios.org/illustration/2012/12/sacrifice-at-chichen-itza/
Walk Through
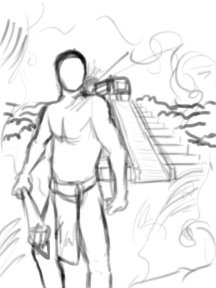
I start off with a very small canvas- 1/36th of the final size (3×4″) with 72ppi. With the brush size and opacity tied to the pressure of my stylus I quickly sketch out my figure and composition on a new layer.
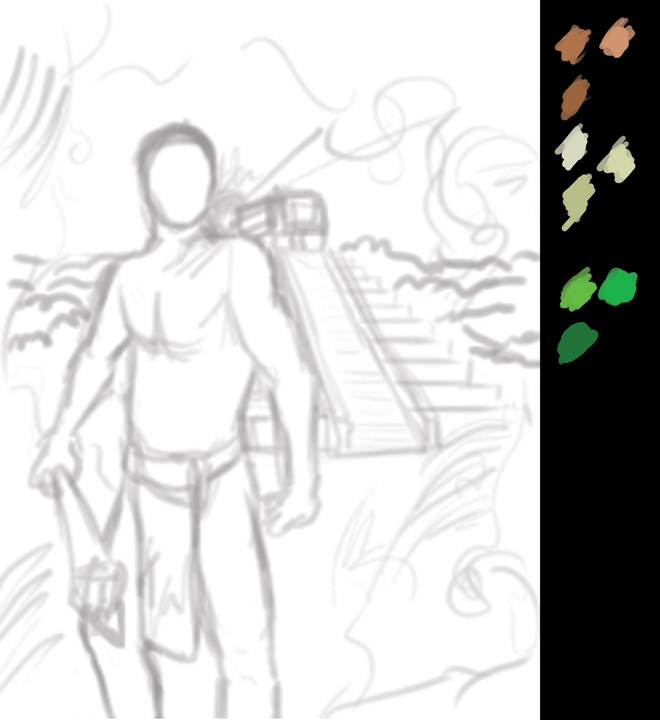
Now I create a new document with 300ppi and my desired canvas size (18×24″) plus 4 extra inches of width to create a color palette. I enlarge my initial low-resolution sketch to fit this canvas, lower the opacity and start picking out colors. As I move forward, I always keep my layers in mind when working on different areas of depth in my painting. It is easy to let this slip your mind and very frustrating to have to work backwards if you do. I suggest systematically naming layers and taking advantage of layer colors.
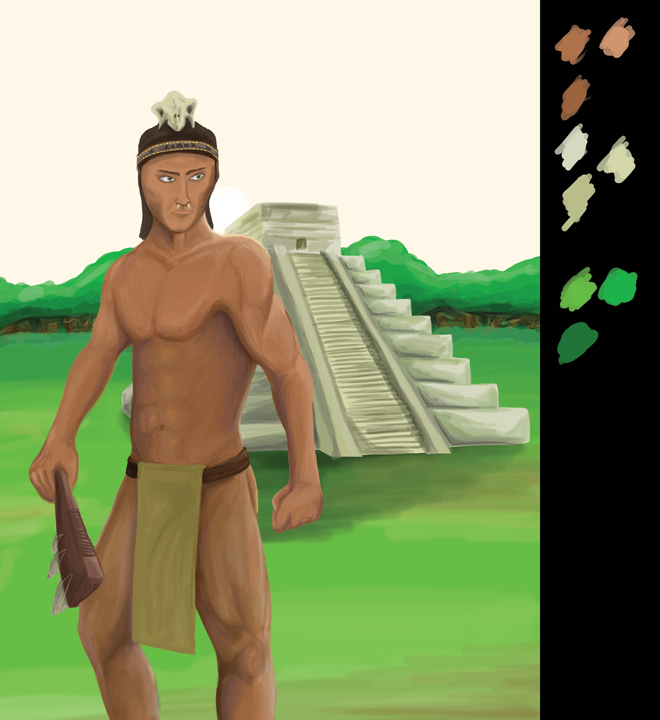
This is where I start to block in the colors for the major elements in the composition. Start very simple, with flat shapes to begin with.
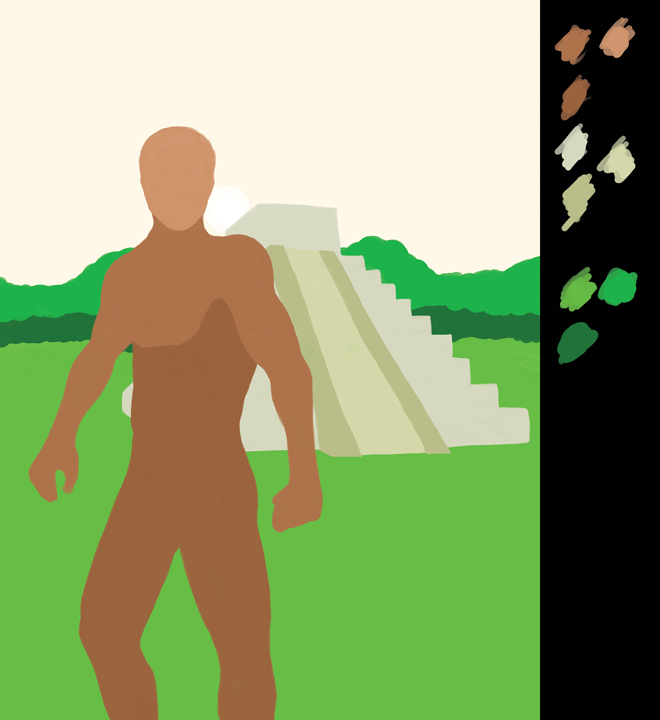
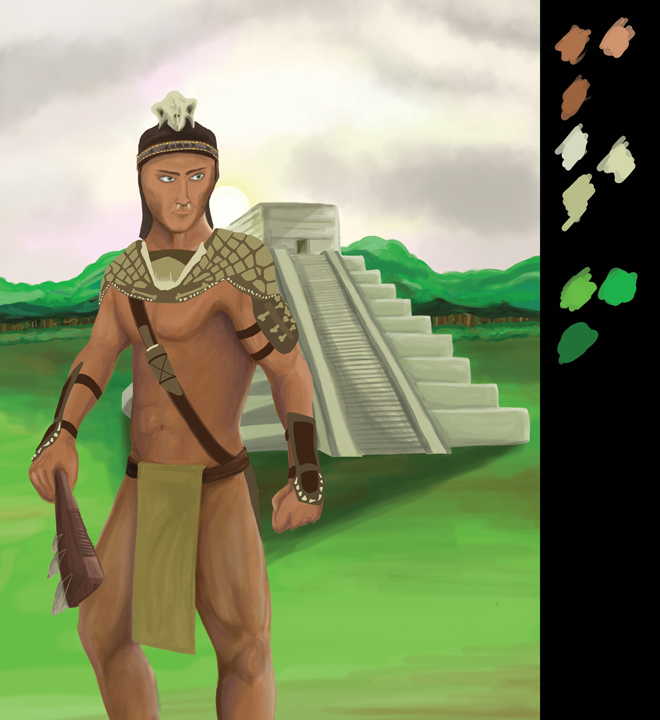
Once the entire canvas has been blocked in, I start painting the detail: shading and highlighting the figure as well as background elements. I also begin adding facial features, clothes, and accessories to the subject. This is not the place to get picky with details; just loose, quick painting. There will be plenty of time to refine your work.
Now that the initial shading and large details are filled in, it is time to get more precise. Setting the zoom to 100% or higher, I add finer details like the warrior’s armor, refine directional lighting, and add clouds to the sky. I leave the shading of the finer details off until they are all blocked in.
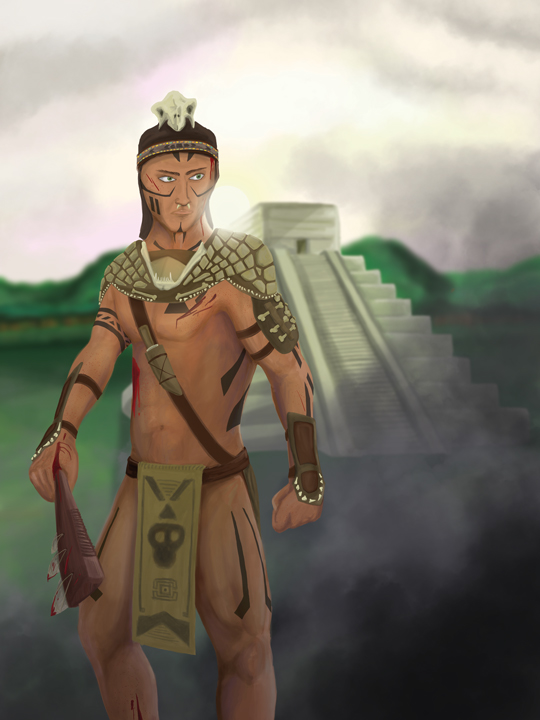
As I finish blocking in the finer details, I add shading and highlights to the armor as well as the final details and effects: tattoos, blood spatter, foreground smoke, and light glare. Using the right blending mode on the effect layers will make all the difference in their realism. For example, I drew all the tattoos on one layer with the blending mode set to ‘darken’ and the opacity set to 60%. The sun glare was done on a layer with its mode to ‘screen’ using a soft brush that had a low opacity. I also merged all the layers that made up the temple and then applied a Gaussian blur to make it appear out of focus and in the background. I did the same with the ground and trees, only using varying blur radii. At this point I am done painting and I remove the extra 4 inches from the canvas, eliminating my color palette from the composition.
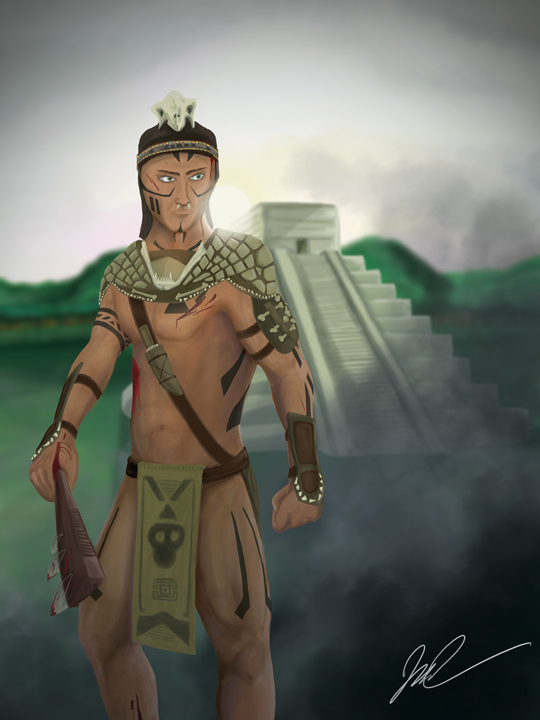
My last step involves only subtle color correction and I added a vignette to dramatize the lighting as well as add some vertical balance. Thanks for reading, and enjoy!
Print Details